Note: Please read the article carefully before proceeding! If in the process of using you encounter any errors, such as broken download links, slow loading blog, or unable to access a certain page on the blog ... then please inform me here. Thanks!
Yes ! When we insert images into Powerpoint, we can encounter many cases, sometimes the images are too large, or the images are too small. And if you insert the image in the usual way, the image inserted into the Slide will appear in its true size.This makes your slides become a lot more ugly and ugly. And of course, if you want your Slide to be more beautiful, more professional, you have to spend time adjusting the image to suit each Slide.
However, if your presentation slides have lots of images, this will take a lot of your time.
Therefore, if you want to insert images into the Slide to a standard size, then we should use a built-in and very useful feature in PowerPoint is the automatic image resizing mode.
And of course, in this article I will guide you How to automatically resize images in PowerPoint to save you time making presentations for you, and it's important that when others want to take pictures from that PowerPoint file they still get the original image file size.
Read more:
#first. Automatic image resizing for an image in Slides
Perform:+ Step 1: In PowerPoint there are many types of slide templates available with many different types of arrangement for us to freely choose.
Perform: You go to Tab
Insert => then select continue New Slide to select the slide template from the list.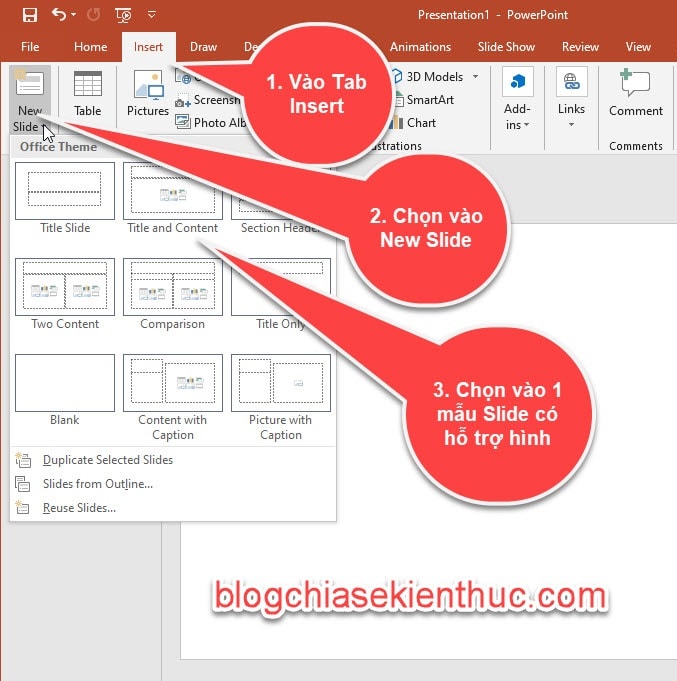
Note: You should choose the slide template that supports images offline.
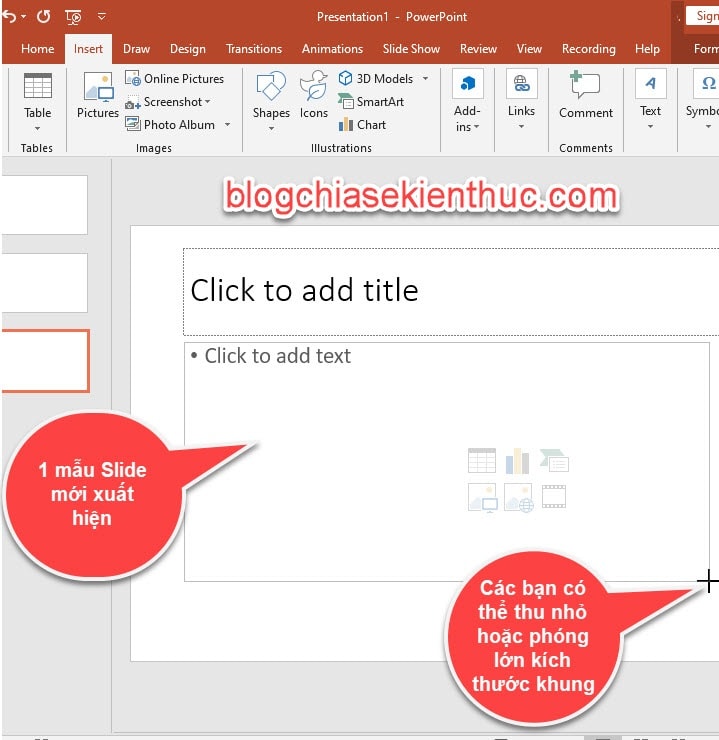
+ Step 2: When you perform inserting a new Slide template, this time it will appear the content frame.
We can resize the frame to the exact size you want the image to display, by holding down => and then dragging the ends of the frame to get the desired size.
+ Step 3: Click on
Picture in the content box to insert the picture.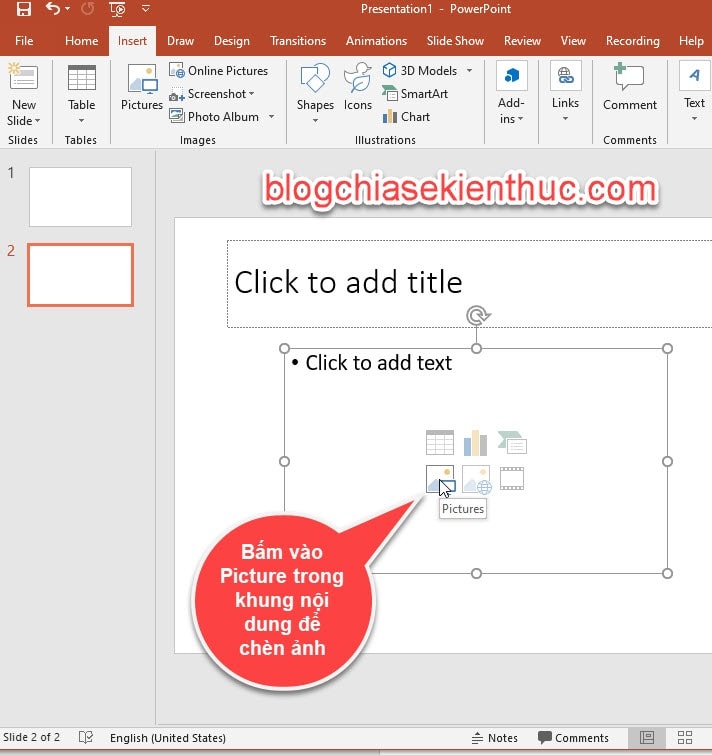
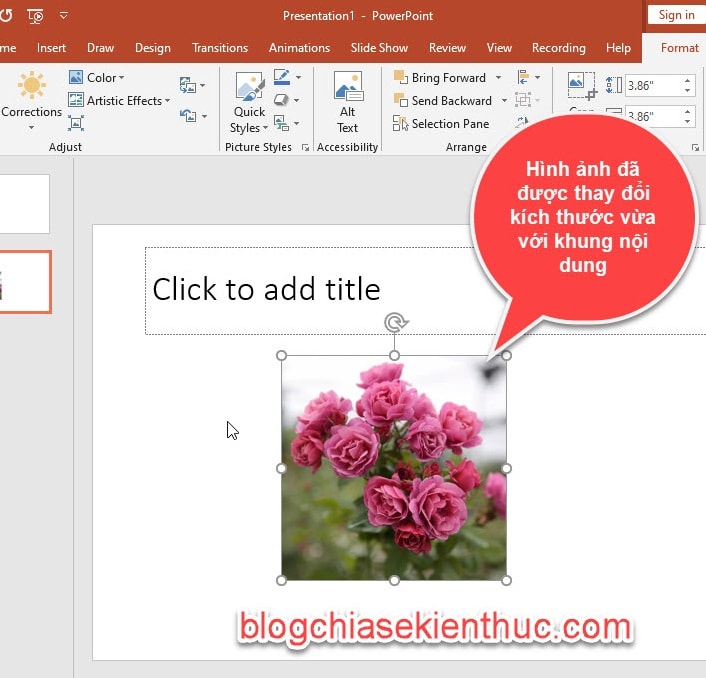
As a result, the image will be automatically resized to fit the content frame, you do not need to proceed to manually resize the image.
The quality of the image is not changed even if you reduce the image size to the minimum.
#2. Automatic image resizing for multiple photos in one Slide
If you want to insert multiple images in the same Slide with the same size, then you can not do as item 1, but now we will move on to another way.+ Step 1: You take turns inserting images into the Slide by going to Tab
Insert => click on Picture.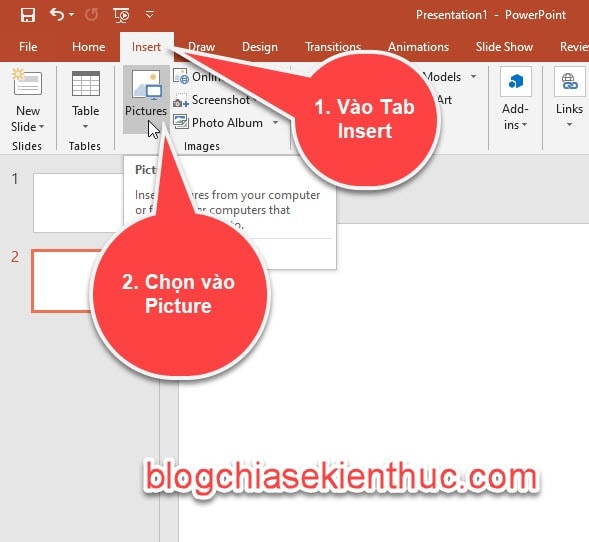
+ Step 2: After you have inserted the image into the Slide, you select one by one by holding down the key
Ctrl then click each picture.Then go to Tab
Fomat => Drag the Size group to resize the whole image => You enter the size in the section Height and Width it's done- Cao: Height of photo
- Width: Width of the photo
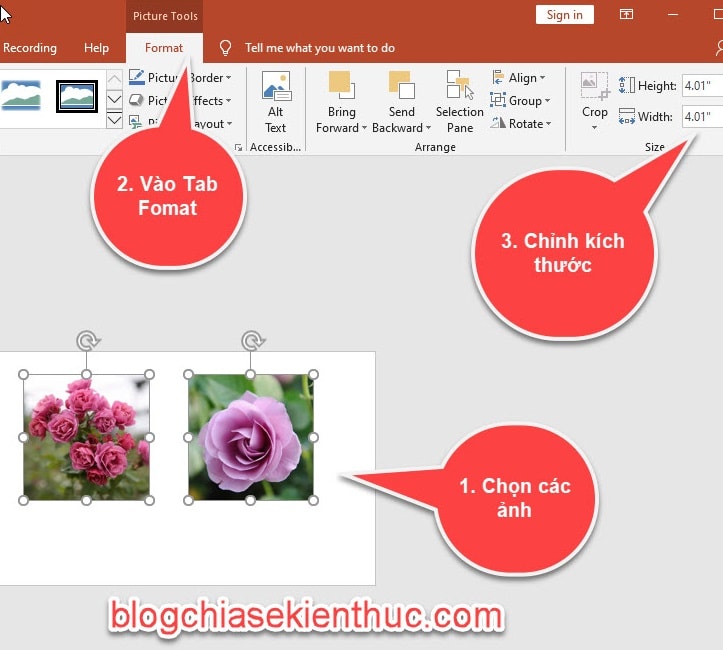
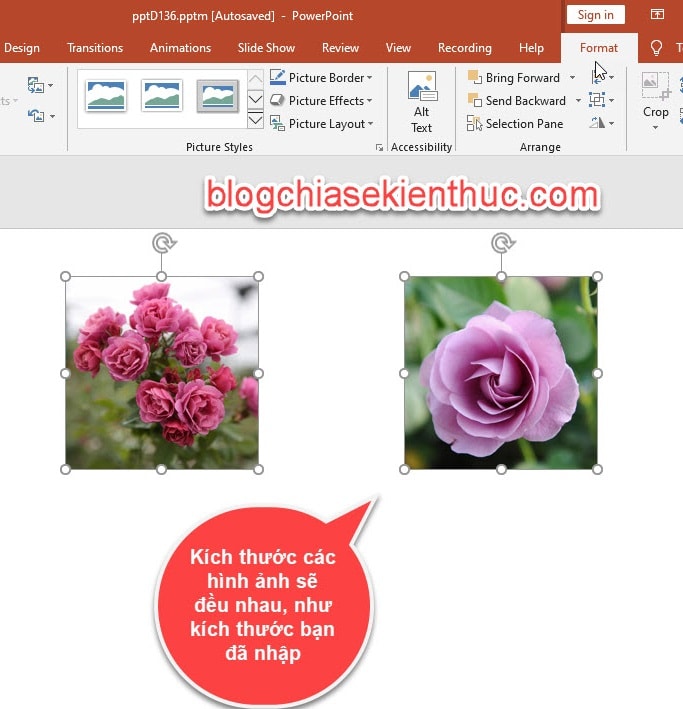
+ Step 3: As a result, the images you select immediately change according to the size you entered above. Very neat and regular, isn't it 😀
# 3. Resize multiple images that are not the same size in the Slide
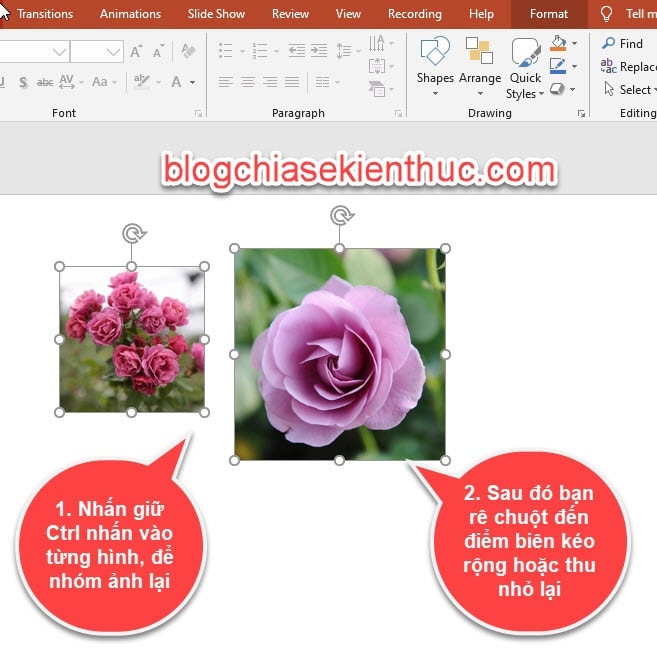
Perform:If you want to resize multiple photos at once, but don't want the same size, do the following:
Perform: You hold the key
Ctrl => then click each image to group them => place the cursor in the border position (the dots) until 2-way arrows appear => then stretch the frame (if you want to zoom in photo), or shrink the frame size (to reduce the image size) according to your usage needs.At this point, each image will resize according to your actions without the same size.
# 4. Conclude
So in this article I have detailed instructions for you How to automatically resize images in PowerPoint (one picture, or many photos in Slide). How to do it is easy is not it ^^!Hopefully this knowledge will help you in your presentations. Good luck !
CTV: Ngoc Cuong - Blogchiasekienthuc.com


Post a Comment
Post a Comment