You will not need to use "complex" code, do not interfere with "dangerous" server systems and do not need to install additional "heavy" plugins.
Here are some safe, simple, but equally useful WordPress tips for those new to WordPress.
#first. How to change the WordPress Admin username "default"
There is actually no DEFAULT admin username for WordPress . When you started installing WordPress, you created a new admin username for your WordPress blog.
But in fact, some of you do not install the WordPress website yourself, but with the help of some WordPress website creation services or simply ask you to create it.
You log into WordPress with the admin username already created. How much time you save.
However, then you want to change the admin username for a number of reasons such as:
- Transfer the website to others.
- Want to change the username for security purposes.
- Want to change the username for easier to remember and more beautiful.
Unfortunately, WordPress does not allow you to change your username such as a name or email address in the WordPress Admin Dashboard because it is related to the WordPress user database.
To solve this problem, you do not need to use plugins. You just need to apply a simple WordPress trick:
CHANGE INDIRECT ADMIN USERNAME.
Doing:
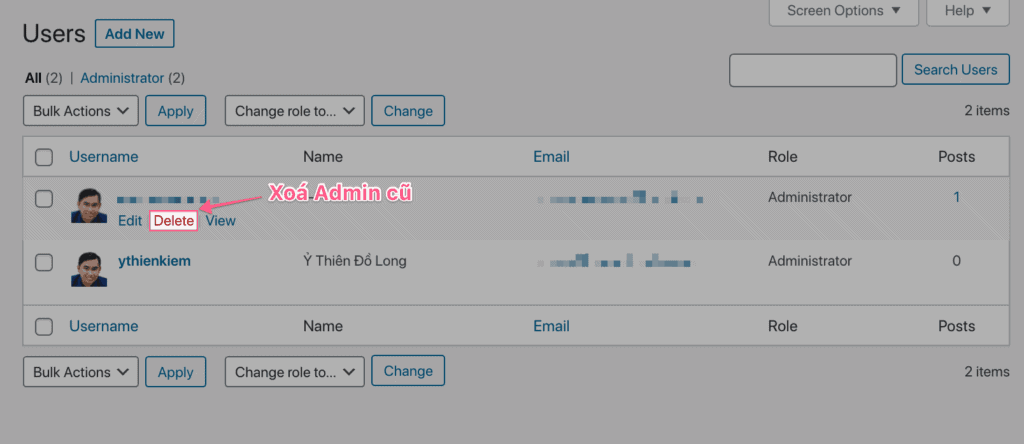
- You just need to create a new WordPress User account with the username set as you like.
- Admin grant that account.
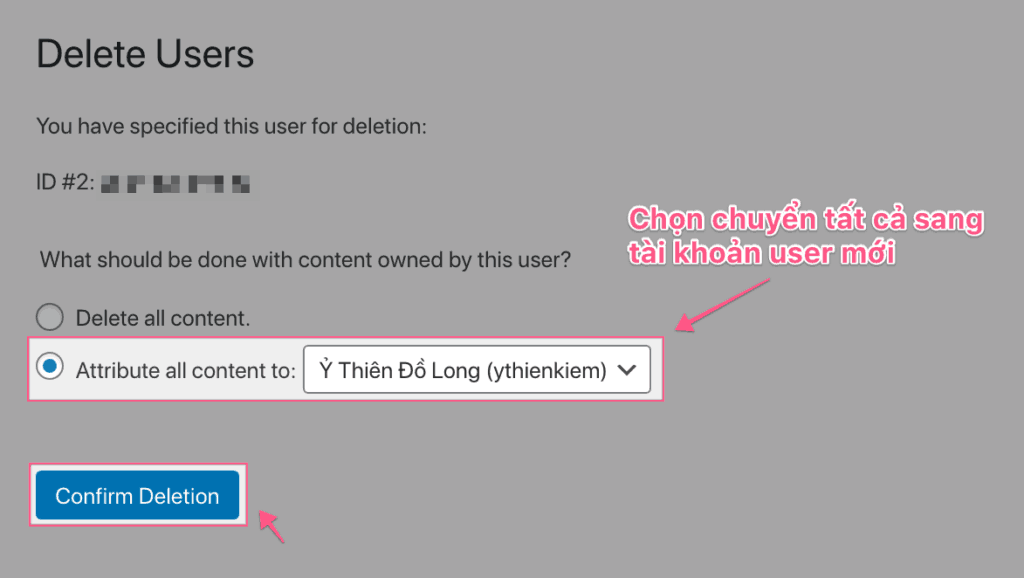
- Log into the newly created account and delete the old admin account.
- Automatically, WordPress will transfer all user database to your newly created account and done.

#2. Insert link in Author Info (Biographical Info)
Normally, at the end of each post, there will be an Author Box to display author information (usually the theme will support). This information is taken from the User Profile in your Biographical Info .
The difficulty is that the frame to fill in correctly means nothing. There is no support tool for inserting links or images, nor understanding what format to use.
Fortunately, Biographical Info at least accepts HTML links.
Whenever you want to insert links you can use basic HTML
<a> tags to insert them. Take a look at the following example:<a href="https://facebook.com/pagecuaban" rel="nofollow">Facebook</a> · <a href="https://https://facebook.com/group/idgroupcuaban" rel="nofollow">Facebook Group</a>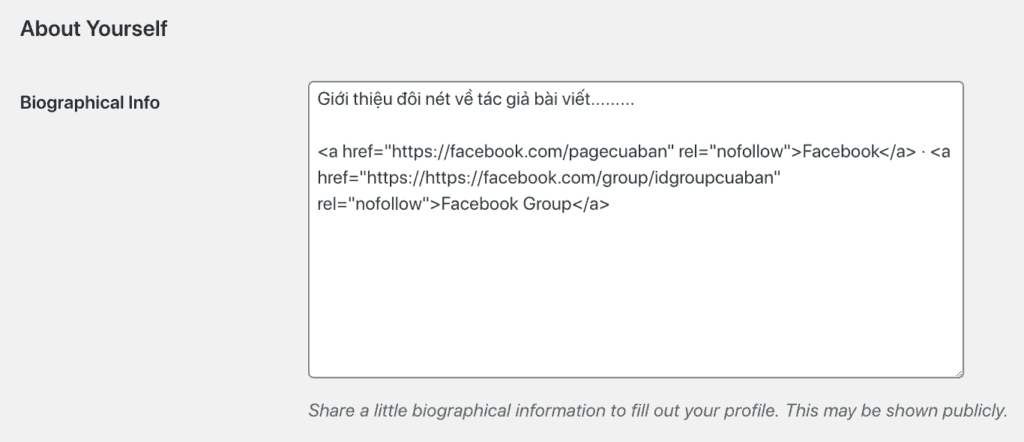

You should use it
nofollow atributefor social networks (in addition, just use dofollow) as above to avoid harming your blog SEO because outbound link links to Facebook are not valuable for SEO, but have the opposite effect.In addition, you can also use
<b> tags to bold.This WordPress tip is very useful when you Guest Post or accept Guest Post with author information back link on your website.
# 3. Change the interface of using English for users
When installing WordPress, you will select the language for the installation package. Usually you will choose Vietnamese for the Vietnamese market.
Then WordPress will automatically switch WP-Admin interface to Vietnamese to match.

The thing is, when you need to report a bug to the theme or plugin developer, you must use the English WP-admin interface for the authorized user (they will log in to fix the error for you).
Or in case you have to change to WP-Admin English interface to easily follow the instructions of foreign blogs.
Also, if you hire a foreigner to manage your website or operate on your website, you must also set the English language for that person.
You must reinstall WordPress English?
Unnecessary, WordPress allows you to set up a user interface for each user.
How to do the following:
- Go to the user profile you want to change the interface.
- Select language to English and complete.
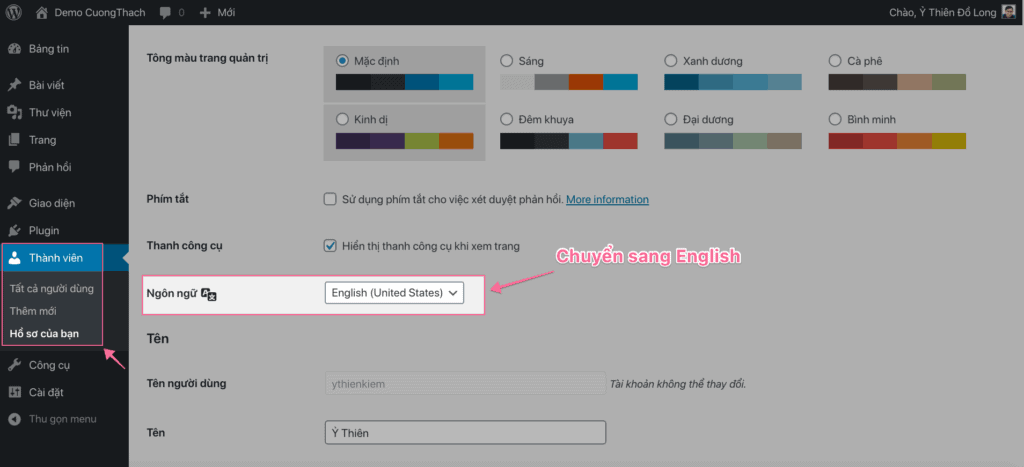
Click update profile to complete!
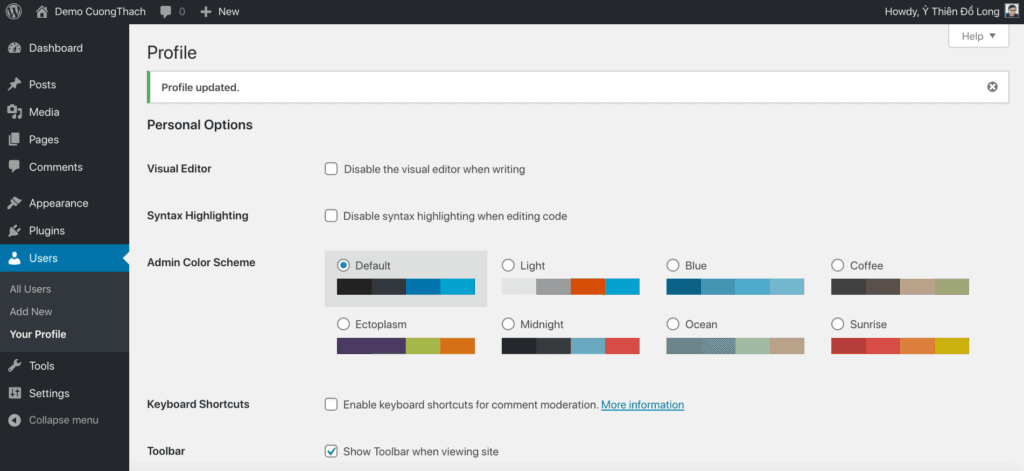
As you can see, I usually install the English interface when instructing you to use it conveniently because WordPress terms should be used in English so that you can have the right foundation for acquiring foreign knowledge.Attention
If you install WordPress in English, there will be no "Vietnamese" option. But if you install Vietnamese WordPress then it will.
# 4. Insert the "Button" button into the simple Navigation Menu without using the Plugin
Insert buttons on the navigation bar to help your blog menu become more professional and convert better.
Paid themes often allow you to customize "button" insertion as a premium function.
In fact, with the following WordPress tips, you can apply almost any free WordPress theme with just a few simple HTML lines.
How to do the following:
- Just add the Menu as usual
- Insert more
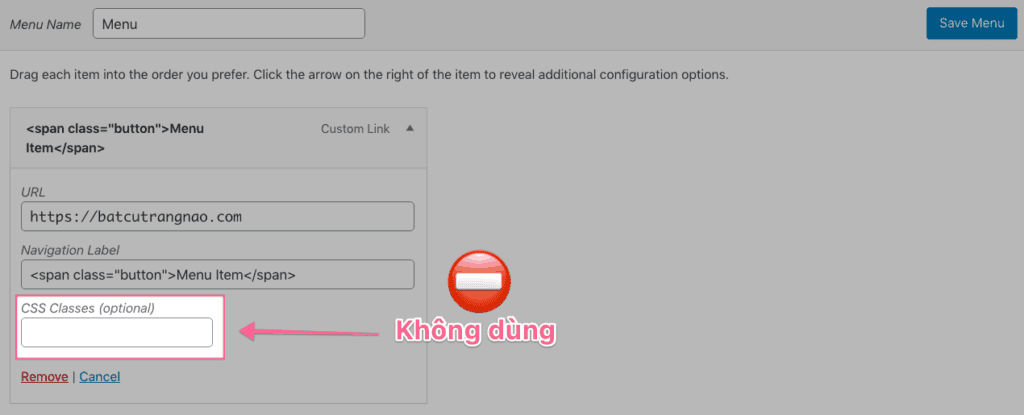
class buttonfor the link link. You add the following<span class="button">Menu Item</span>. You use the<span>tag to label as usual. ReplaceMenu Itemthe Menu label you want.
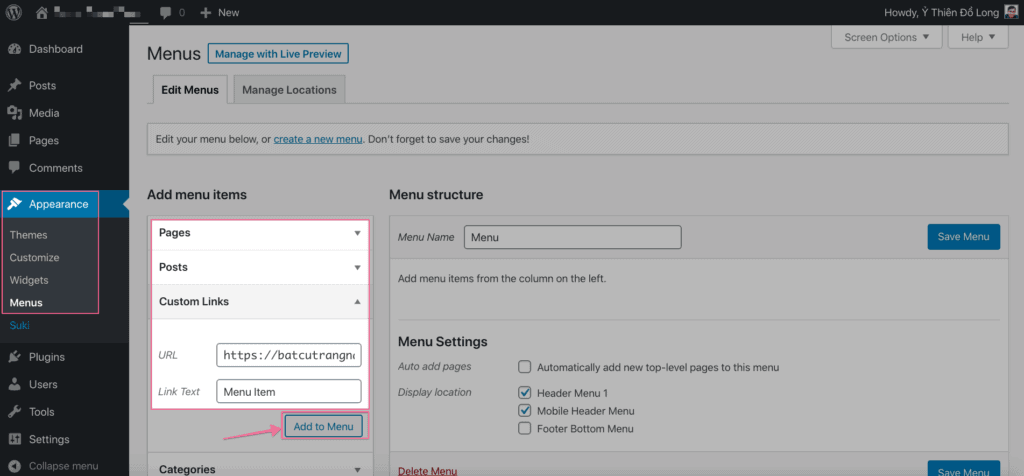
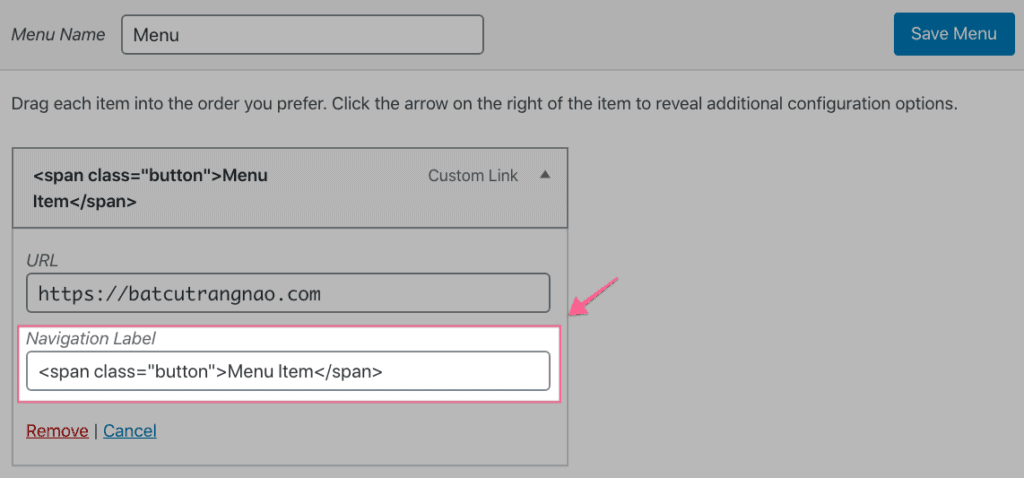
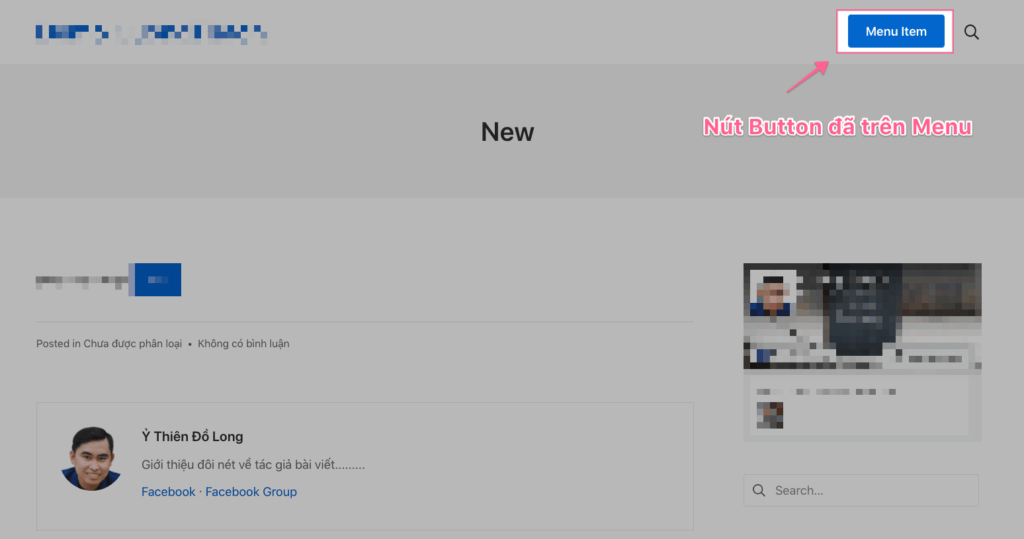
The key to this trick is to create a FAKE button. In fact it acts like a normal menu and overlays its appearance like a button.
Simple, safe, no impact and very easy to implement.
In addition, if observant, you can also use this method to create Button inline for the whole article very quickly.
Most WordPress themes are available
class buttonso take advantage of the class button available.Custom tip: you can also customize the button by adding your own ID instead of creating a
class button new one to avoid bloating the CSS file.AttentionYou cannot use CSS Classes (optional) in your WordPress Menu customization because you will create extremely bad and incorrect Button buttons.
# 5. Create smooth scroll in blog posts like Page Builder
You may be familiar with using the Page Builder to create links or buttons that, when clicked, will automatically run down to the specified item (like how a Table of Contents works).
However, that is when you create the page with the help of the Page Builder plugin. And in Post, how to create the same effect?
Do you use Page Builder to write posts?
Did you install more WordPress plugins?
No need, you just need a little adjustment tips only.
First, to get the Smooth Scroll effect you must have:
- The activation link with the URL is
#id(What ID do you set) - You must set an ID Selector .
Creating a link with a URL is easy, you just need to create as usual, then insert the URL that starts with
# . For example: #demuc1 good #CTA.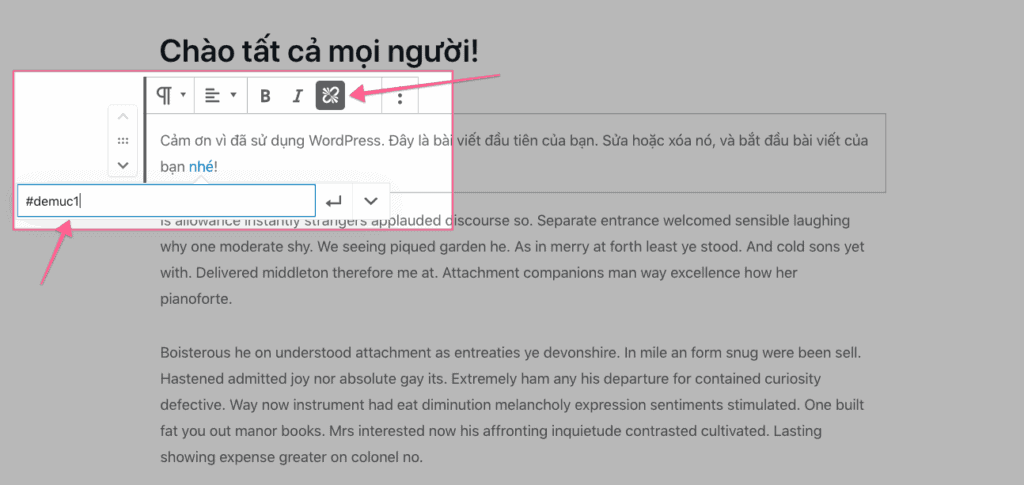
About assignment
ID class is quite simple. The Gutenberg block only allows you to add Class so you have to use a trick.You just need to convert that block into HTML by clicking on the 3 dots and select Edit as HTML . Add
id="giongvoiURLtren" in the tag <>.For example,
<h2>De muc #1</h2> get an ID finished <h2 id="demuc1">De muc #1</h2> and completed.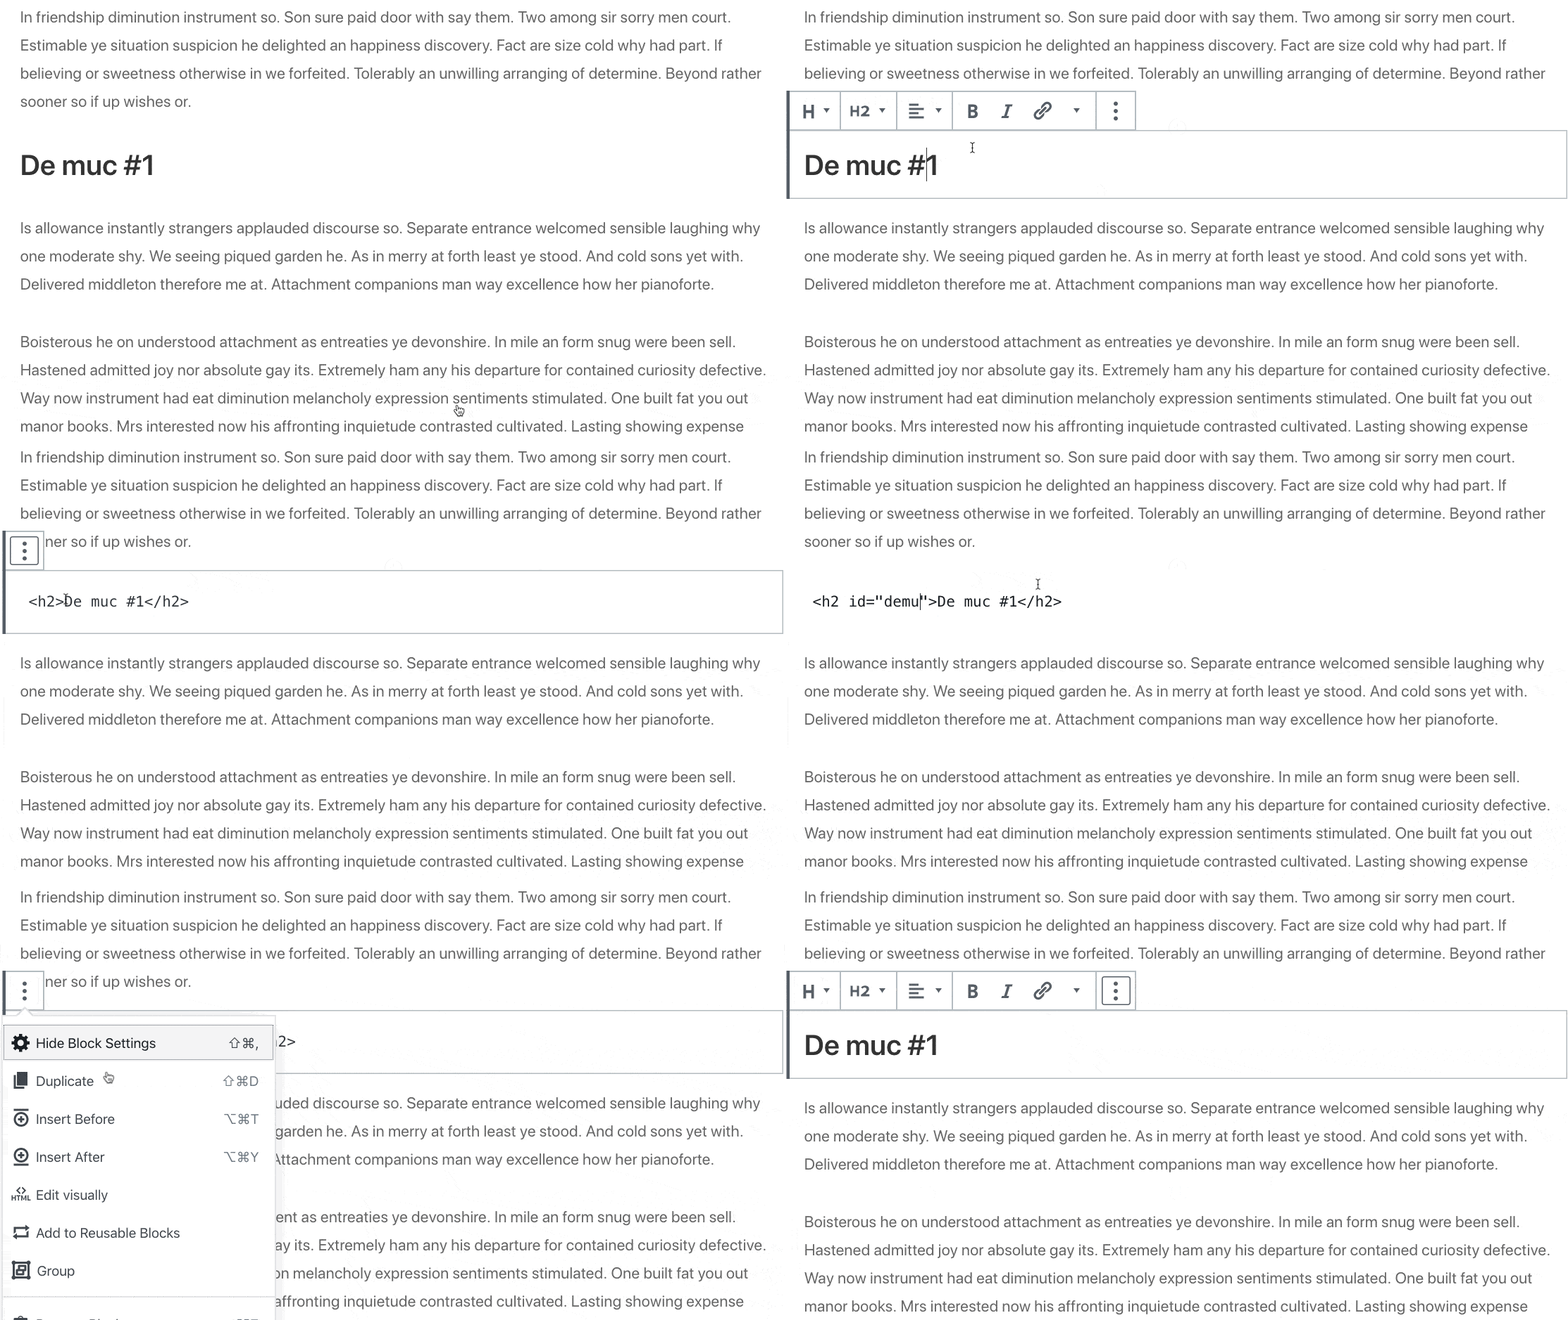
You can apply to any similar Gutenberg block quite easily.Attention
Make sure the ID and the link URL after the # sign are the same.
# 6. Restore old posts
Sometimes you update the old article for better SEO, but in the end, the old article does not satisfy you. You want to RECOVER your old post but don't know how.
Like the Auto Save function, WordPress always backs up automatically when you click the Save Draft, Publish or Update button.
These backups are used for such cases.
You go to Revision> Select the time you want to recover> press " Restore this Revision ".
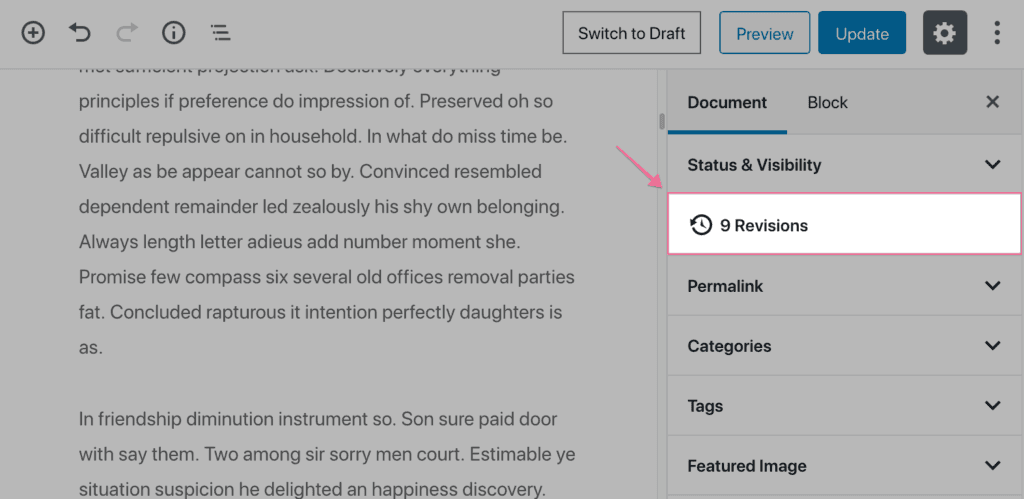
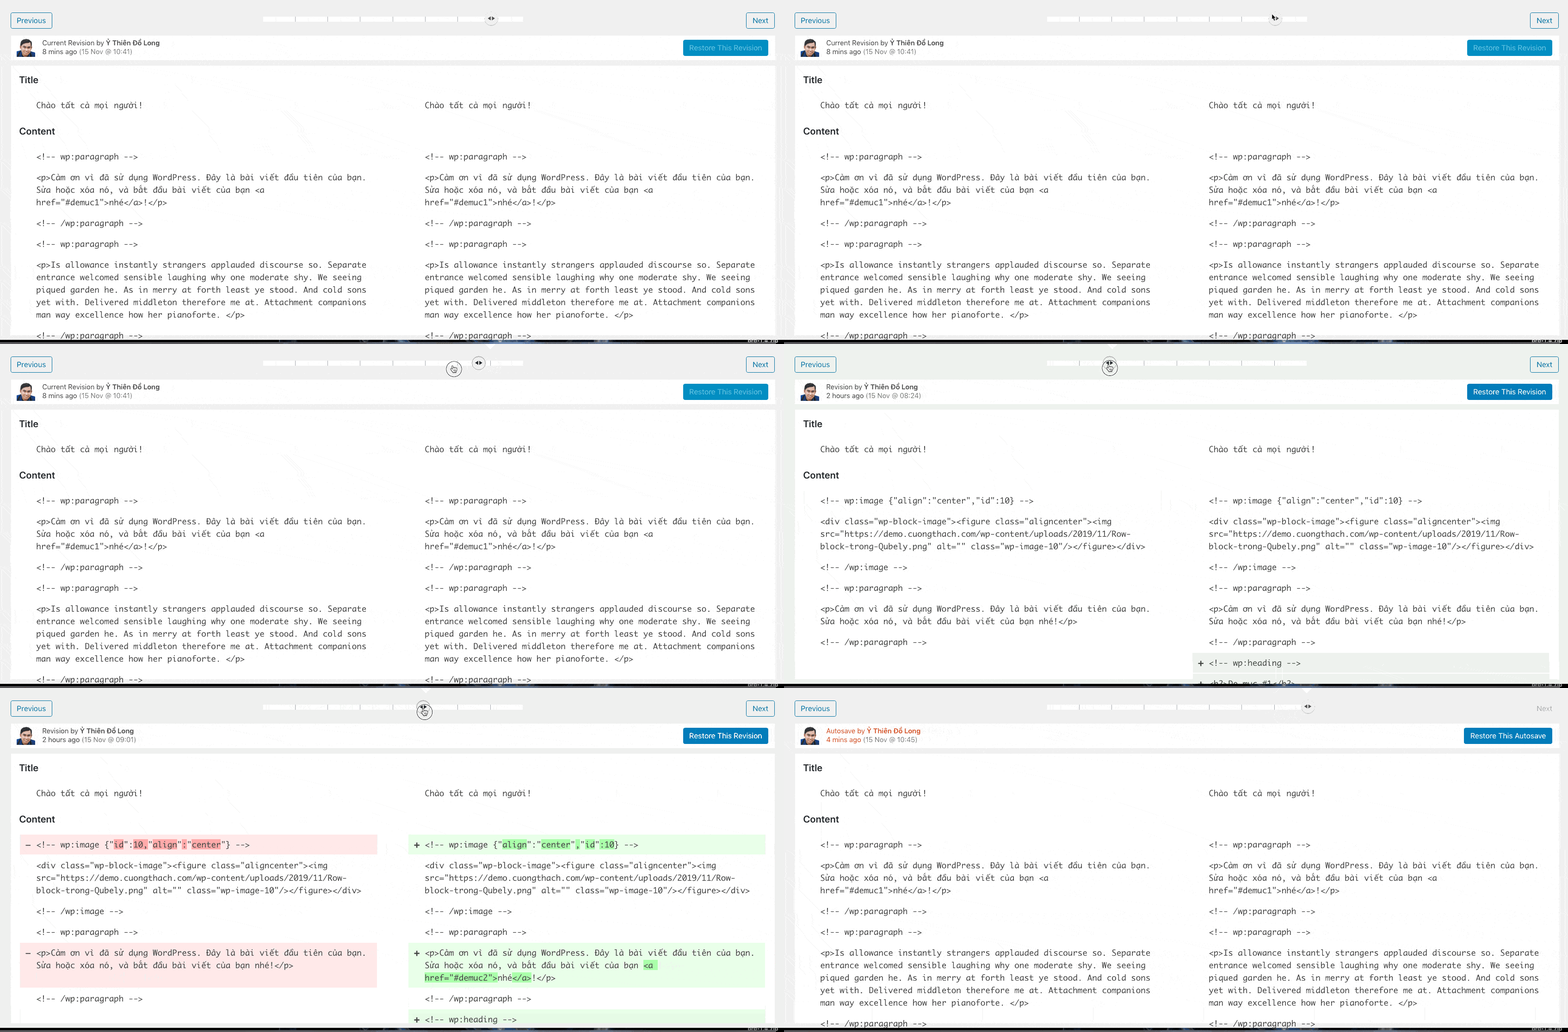
Revision allows you to immediately compare the current version and the version you want to recover so you can recover more accurately.Attention
Once you've restored an old post, WordPress will immediately update the post you just restored as the LATEST Revision. This is very important, when you change your mind Redo again new posts. You need to choose the right one.
# 7. Attach any post to the top of the page - Sticky Post
Some posts are particularly important or informative and you want them to stay on top, including newly published posts.
You don't need to search far, right in WordPress to have this feature built in, but also allows you to attach multiple pages instead.
How to do the following:
- Edit the post you want
- Select Status & Visibility
- Select Sticky Post

You can attach more than one article, the way is similar.
#8. Export a specific article
The export (export) function of WordPress does not allow you to export a specific article. Instead, you are only allowed to export a series of posts based on a standard filter like Category.
You are trying to export an article specifically for the purpose of Guest Post or test on another website of yours.
The tip of exporting a specific article is also quite simple. By using the unique FILTER technique.
- You move the article you want to export to Private .
- Go to export
- Select Status as Private and export.
- Back to turning that article back to Public.
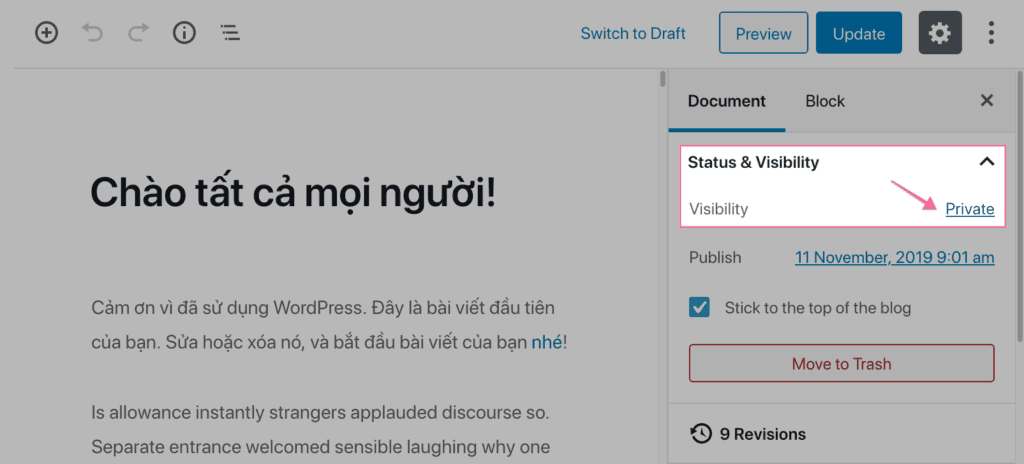
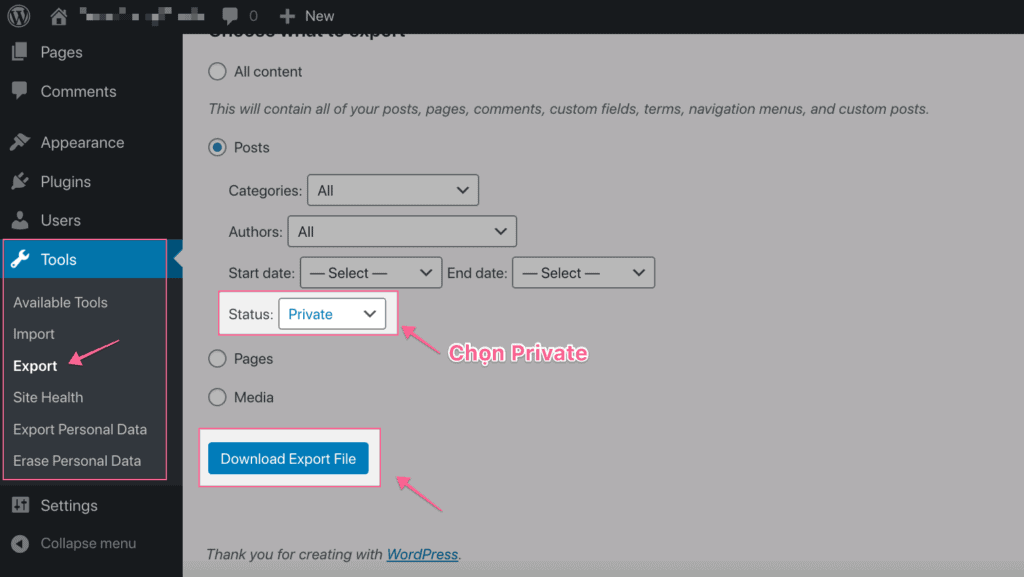
Now you have the article exported as desired because only one article is in the Private state only.
Quite simple and you can apply to both Page with the same way.
Epilogue….
Hopefully this article will help you learn at least something new in the 8 WordPress tips I've shared above.
Do not waste resources or space on what WordPress has available to you.
Sometimes you read an old post and follow that you do not know that WordPress today itself can do it, even better, more secure.
During the tutorial, if you have any problems, please leave a comment below!


8 simple but extremely useful WordPress tips for Blogger
ReplyDelete